
My Workflow
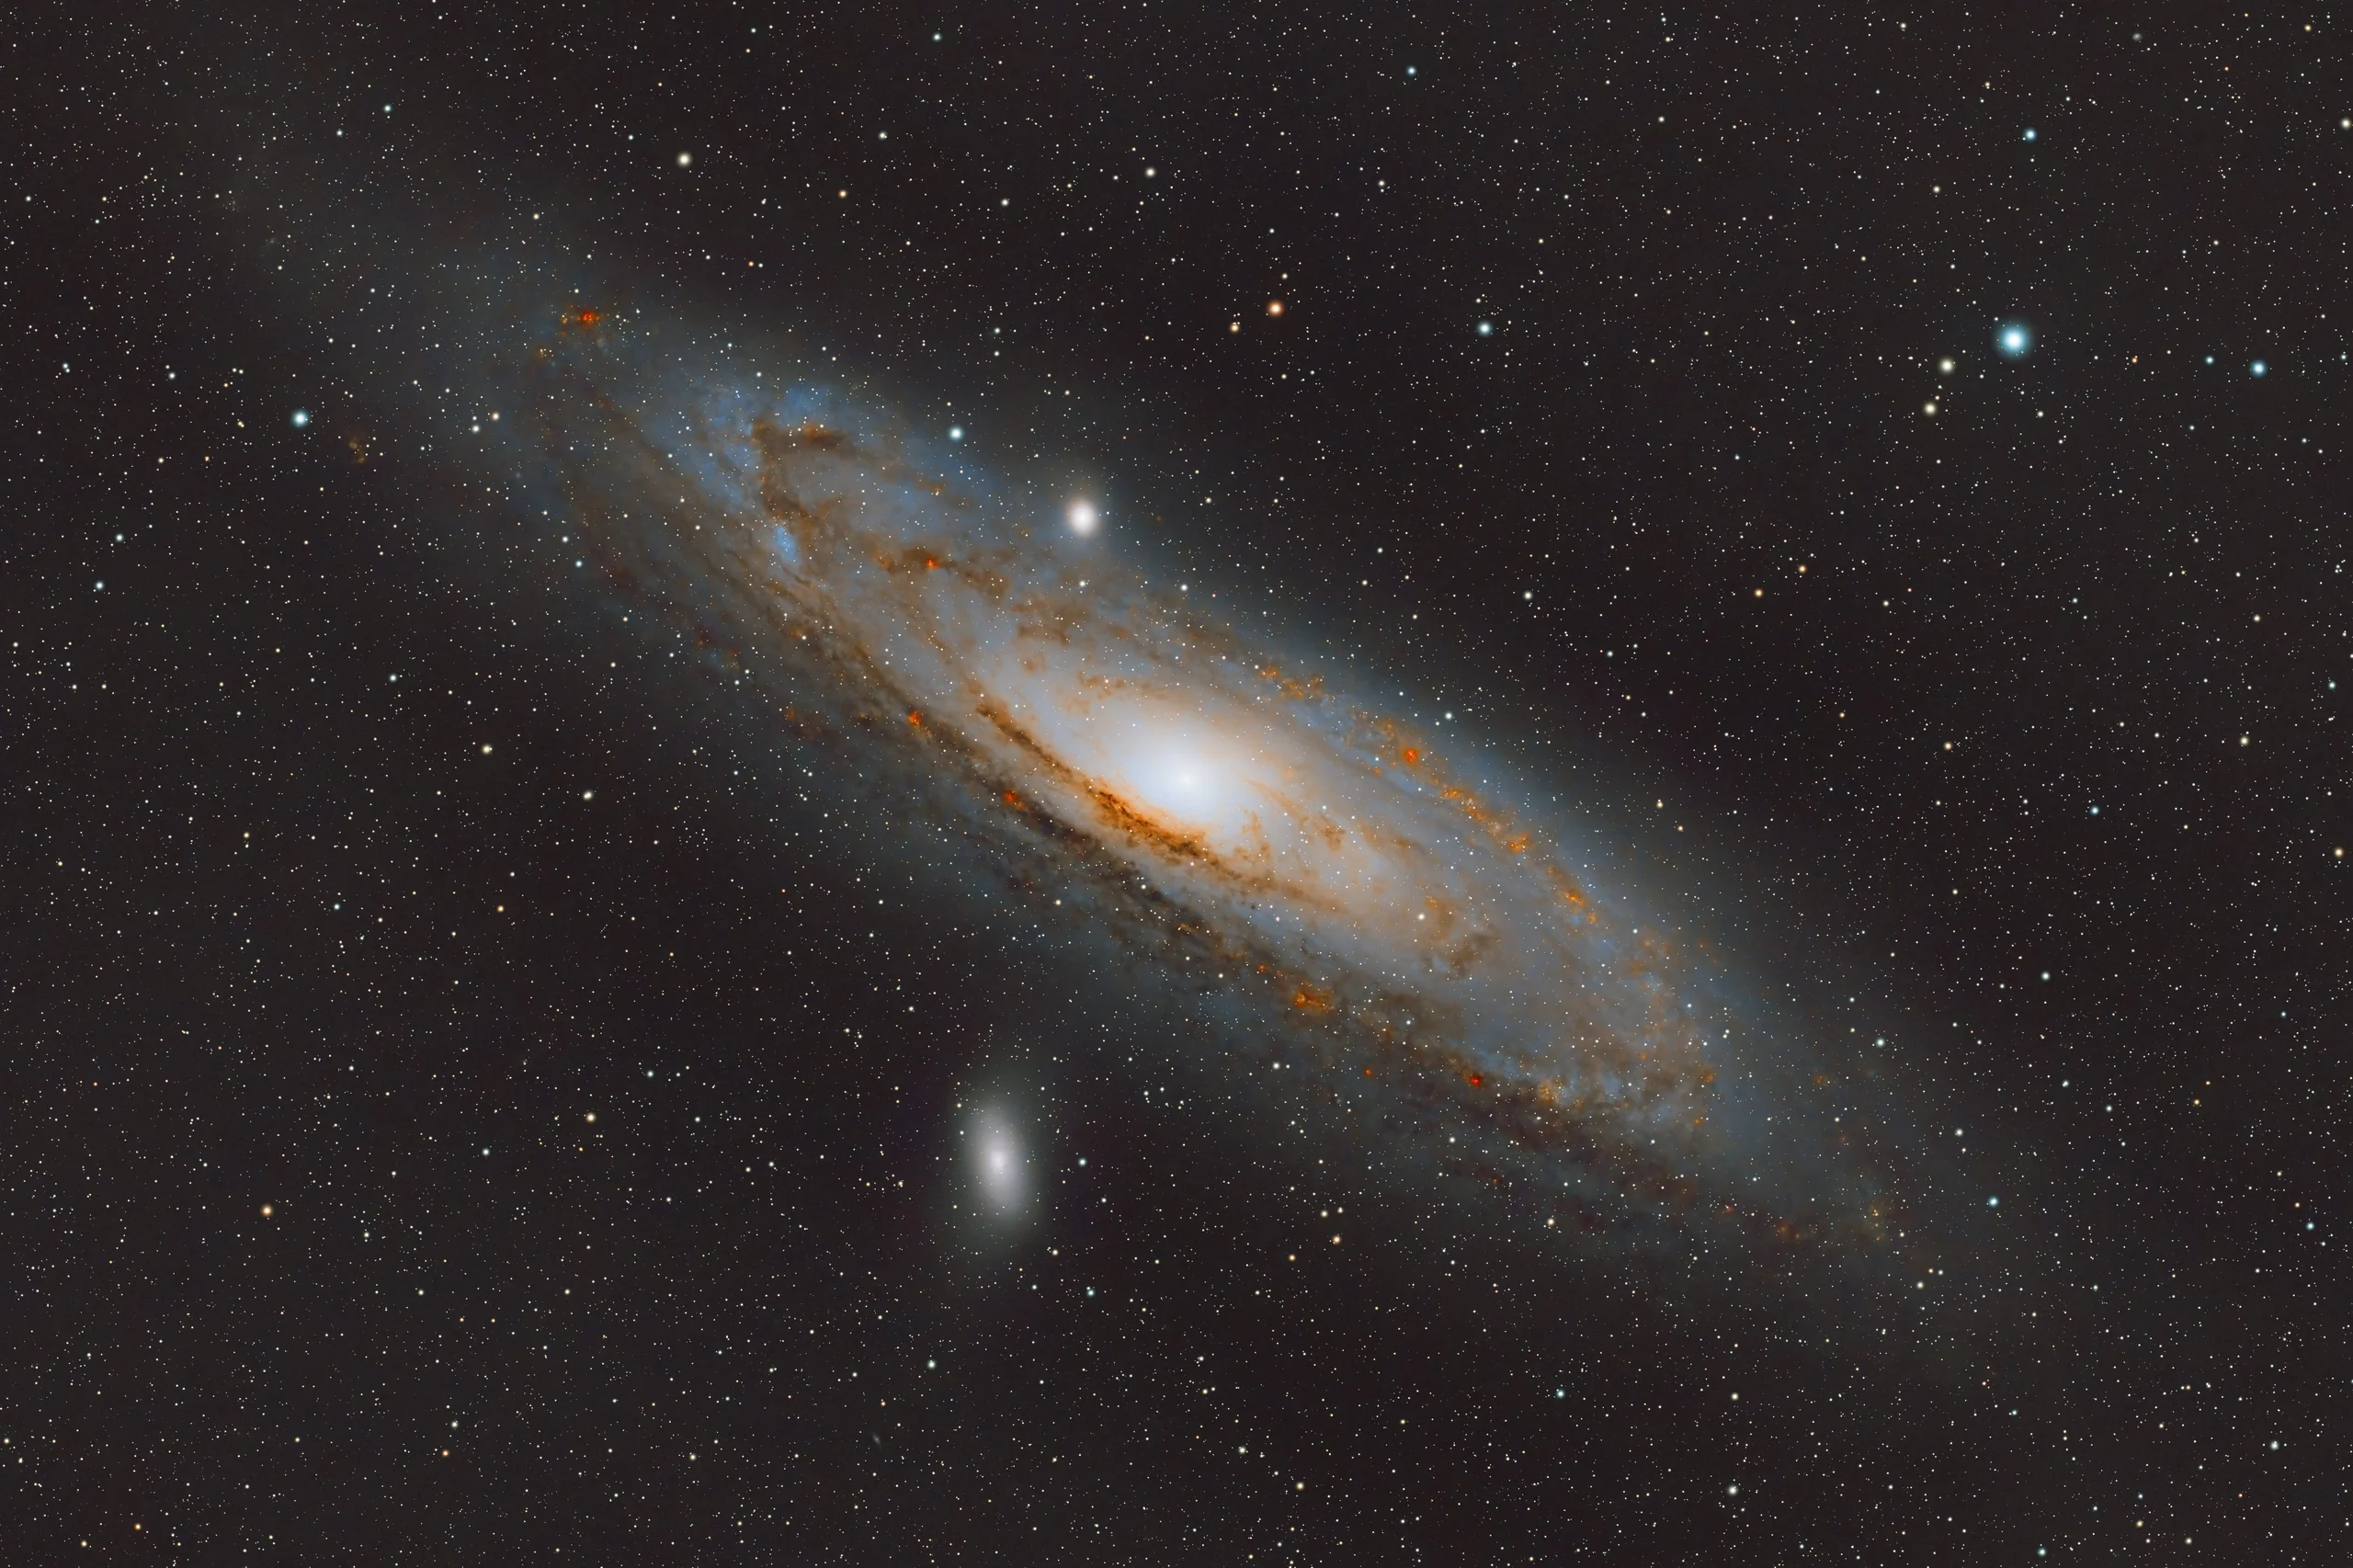
This workflow shows how a deep-sky image, such as this view of the Andromeda Galaxy (M31), develops from a faint camera frame into a vivid, detailed photograph.
 BeforeAfter
Even the "before" image shown here has received a temporary screen stretch. Straight from the camera, the raw frame looks almost black, with only the brightest stars immediately visible. The color and structure are present, but compressed into a narrow range of brightness values. Stretching redistributes those values so a monitor can reveal the galaxy's color, dust lanes, and spiral structure.
Astrophotography can feel like magic, but the process is a blend of careful planning, precise equipment setup, patient data collection, and detailed image processing. The three stages below explain that journey.
Planning
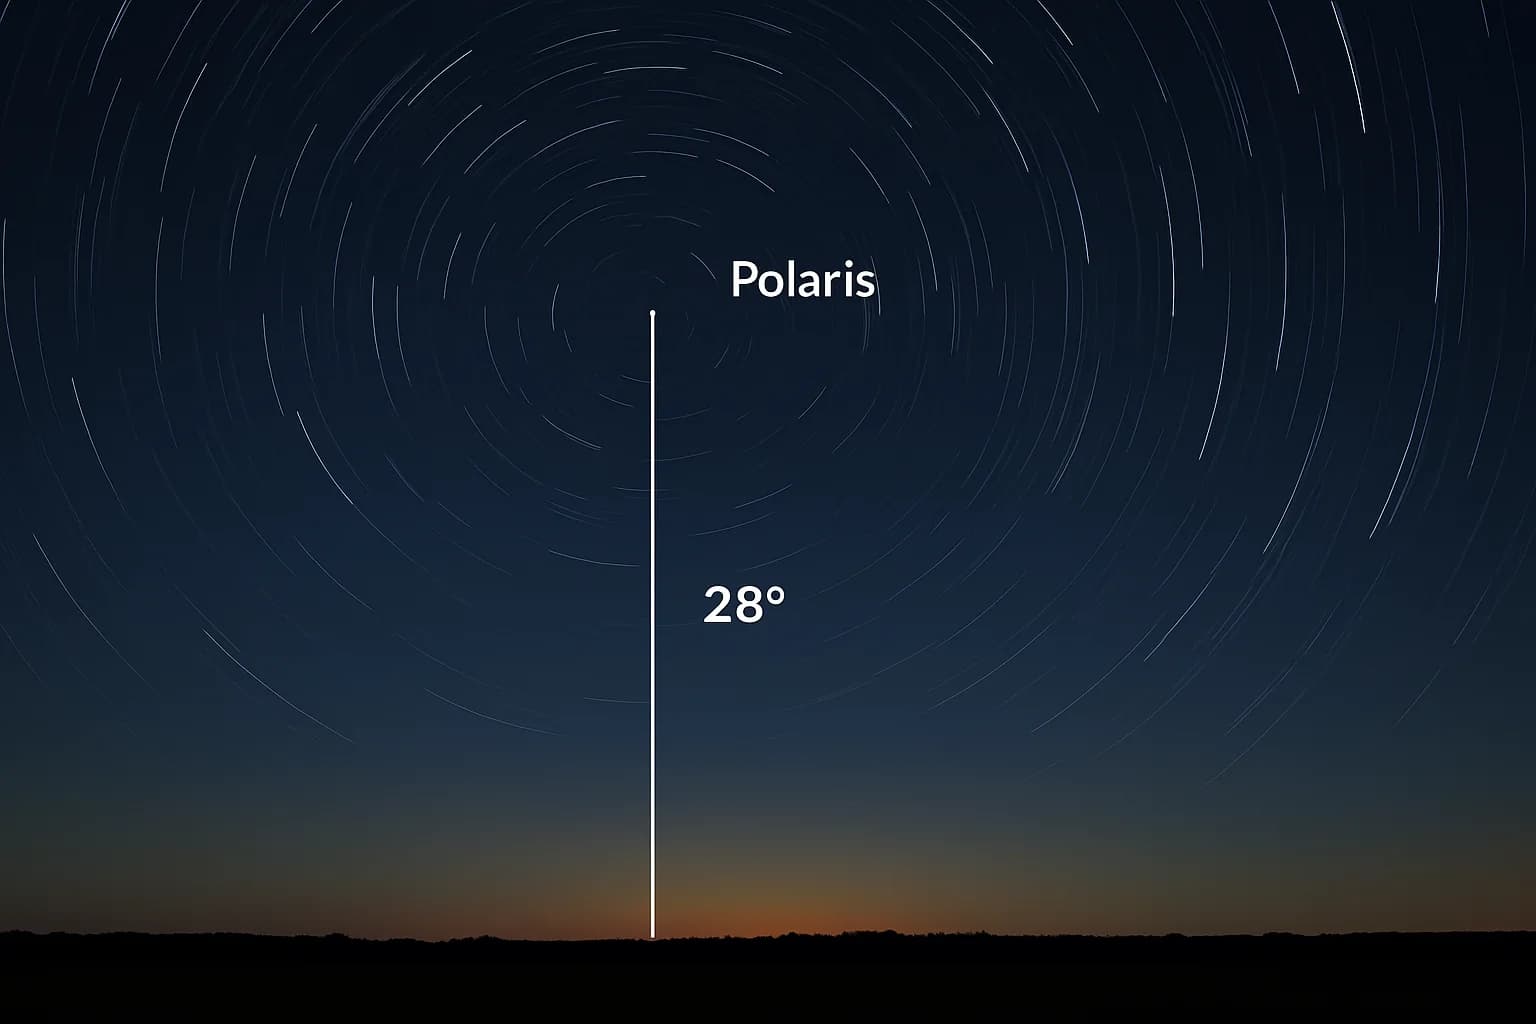
From sky charts to target lock.
Before photographing something 2.5 million light-years away, you need to know when it is visible, how high it will rise, and how long it will remain in a useful part of the sky.
- Choosing a target: Select objects based on location, season, altitude, and visibility.
- Timing and conditions: Account for moonlight, light pollution, clouds, transparency, and atmospheric seeing.
- Framing and composition: Match the target to the camera and telescope field of view.
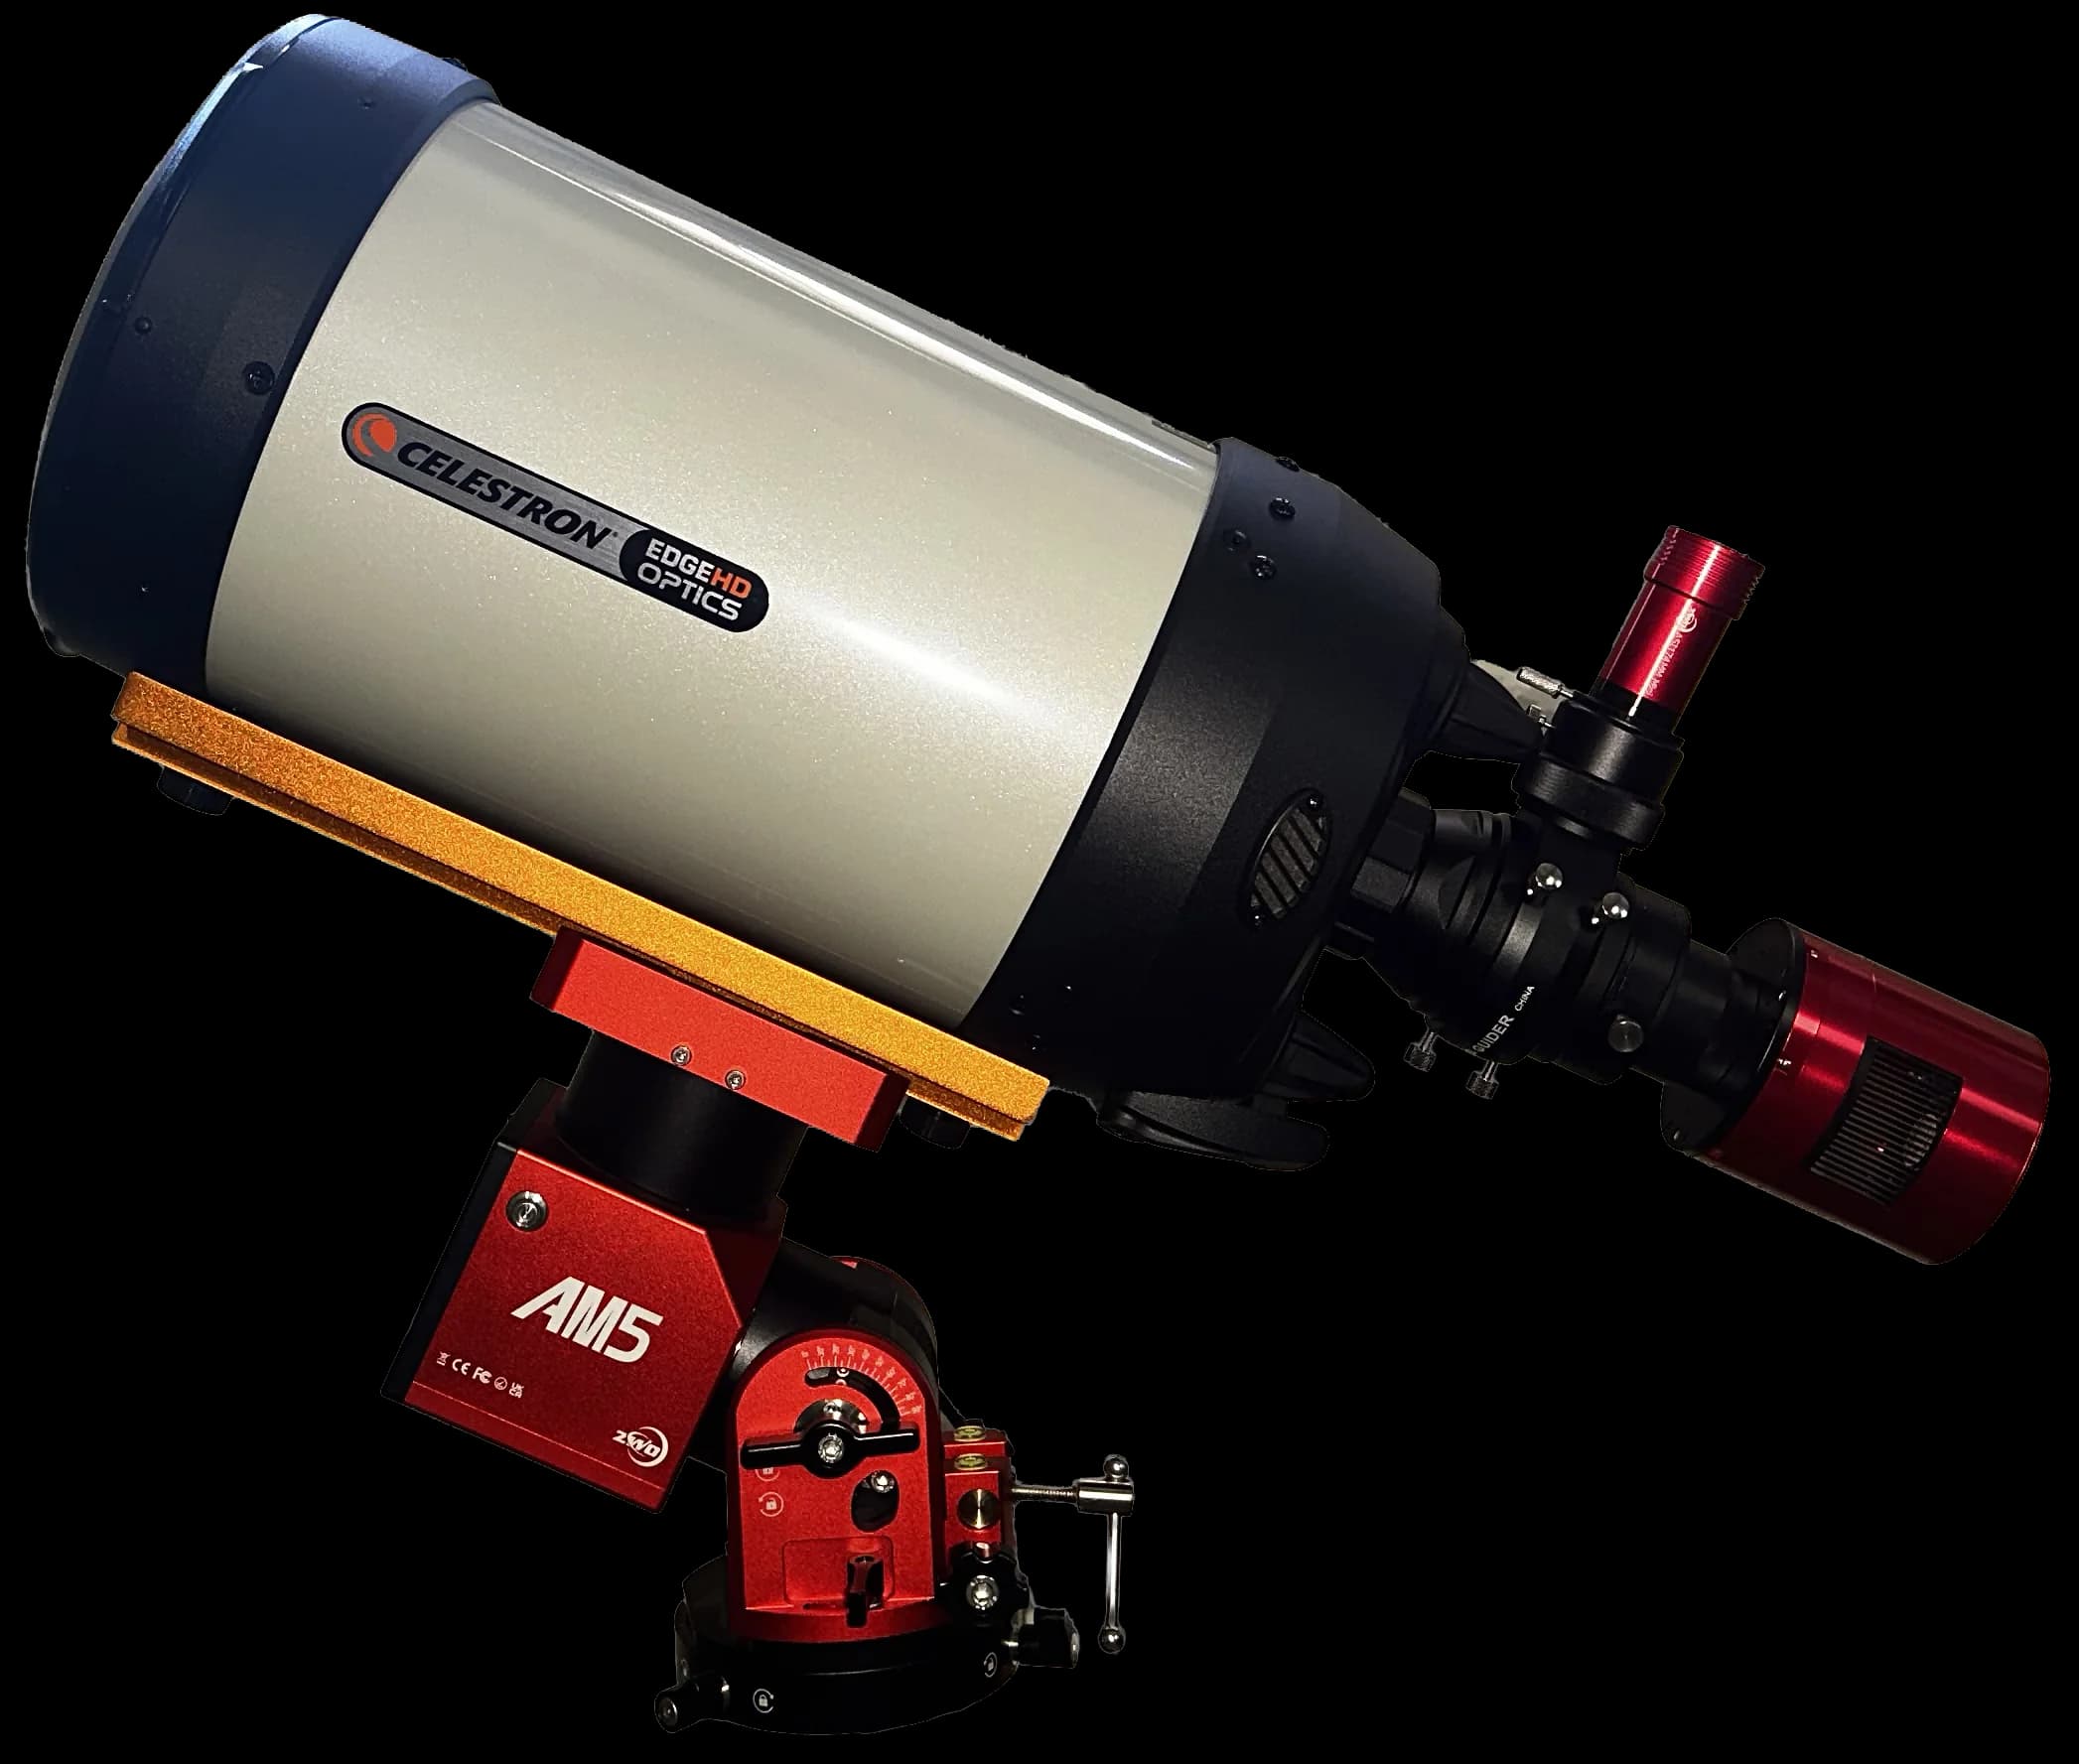
Equipment
Precision tools for distant worlds.
Behind every strong astrophotograph is a carefully matched set of equipment. You do not need a space telescope, but you do need to understand how each part of the imaging rig contributes.
- Telescope and camera: Match focal length, aperture, sensor size, and pixel scale to the target.
- Polar alignment and tracking: Keep the camera locked on the same part of the rotating sky during long exposures.
- Focusing: Use precise focusing tools to keep stars small and sharp.
- Autoguiding and exposure settings: Correct tracking drift during multi-minute sub-exposures.
- Calibration frames: Use dark, flat, and bias frames to correct sensor noise, dust shadows, and vignetting.
Image Processing
Turning raw data into a finished image.
After hours of exposure time, a session may produce dozens or hundreds of individual frames. Processing combines and refines that data.
- Image stacking: Combine multiple exposures to reduce random noise and strengthen faint signal.
- Post-processing: Stretch the image, balance color, reduce gradients and noise, and refine contrast without losing delicate detail.